How to make Bakery Boxes:
All bakeries and confectioners make different eatables that are unique in shape and tasty. People have to take these items with them at their place due to which packaging is required. However, the packaging has to be good enough to keep the quality, taste, and freshness of the things for a long time. Bakery boxes are the preferable bundling for the bakery items.

They are made up from top quality cardboard and paperboard material. Some of them have window panes and handles. They are printed in beautiful shades and patterns. They are produced in such a way that they protect the items at the same time make them presentable. Creativity and innovativeness are involved in the production to make items standout in the market. Customizations are involved according to the wish and demand of the bakeries and confectioners.
How to make Bakery Boxes?
Paperboard and cardboard are environment-friendly items that are utilized to make the trays, storage containers and another sort of bakery boxes. These materials are taken in thin form due to which they are easily foldable in numerous forms. They are quite functional and simple to use.

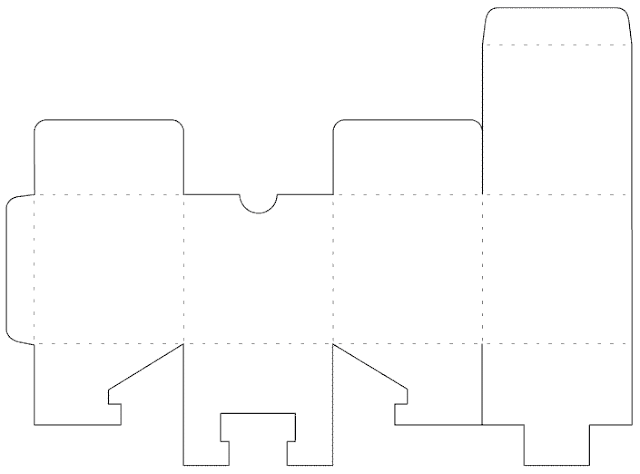
- First of all, you have to select the paper that you need. We are going to take a rectangular one to make the rectangular box. You can easily take the patterned paper. Otherwise, get the best template design and print it on the paper. It is good to do the practice of folding on simple paper.
- Start folding the paper vertically but in half. If you are utilizing the patterned paper, then ensure that the pattern is on the outer side. Now you have to unfold it again. Ensure that every fold is creased. Use a coin or fingernail to make the sharp crease.
- At the moment, fold up every side of that paper towards the center crease. Now take the edge and make a line with the center crease. Make sure that the patterned side is outside. Unfold it once more. At present, it would be in quarters sectioned widthwise.
- Start folding the whole paper in half but only lengthwise. Again the patterned side would be outside. Start unfolding the paper yet again. It would be in 8 equivalent sections.
- It is time to fold up every short side towards the center crease. You have to do the same step with this lengthwise center crease that you have done in step 3. In this manner, you will give out four sections to a new side. The paper would now get sixteen sections in total. There is no need to unfold the paper at this moment. Let it be folded lengthwise.
- Fold every corner of the paper now. Line up the corners with the next lengthwise crease. The corners that are folded would make right triangular shapes along with bases flush with the crease lengthwise. Finally, you would get an uneven octagon. The paper strip would be between the center creased edges as well as the edge of the recently folded corner, making a flap.
- It is the time to fold up the flaps from the center down over the triangles. This would open up the center of the paper thus you could easily view the center crease present in the box. This flap would be seen from the outside of the box. If you are creating a decorative bakery box, then you may start using the 2 sided patterned papers for more beautification.
- You need to pull up on the 2 flaps. You could easily grip them up with the creases present in the center. In this way, you will get a complete box. You could also re-create a few folds to make the box strong and dependable.
- Give finishing to it. You can make use of scotch tape on the corners in the case you want them to sit in flat. Adorn the bed of the box with the help of pens and markers.

Note: You can make this rectangular wholesale bakery boxes with the thin paperboard or cardboard. But if you are going to use any thick material then you first have to get it printed in the pattern you like. Also, you have to make scrolling tools to make the creases sharp as fingernail and coin would not be able to make creases.


